在如今社交媒体充斥着各种图片的时代,如何保护自己的作品不被盗用成为了摄影爱好者们关注的焦点,而在使用iPhone手机拍摄照片后,为了确保图片的版权,加上水印是一种常见的做法。苹果手机拍照加水印的步骤简单易行,只需要几个简单的操作,就能让你的作品更具个性化和独特性。接下来就让我们来一起了解一下如何在iPhone手机拍照后添加水印吧!
苹果手机拍照加水印步骤
步骤如下:
1.打开苹果手机之后,解锁手机并进入桌面。找到桌面上的快捷指令选项,点击快捷指令。

2.在快捷指令库页面里面,找到给iPhone添加相机水印按钮。然后点击选择。

3.这时候就会出现一个页面,在这个页面里面。有两个选项,点击拍照添加水印。

4.点击拍照添加水印之后,系统会弹出访问相机的请求,点击好选项。

5.相机随后打开,进行拍照,拍照后点击使用。

6.然后返回快捷指令库,点击创建快捷指令。

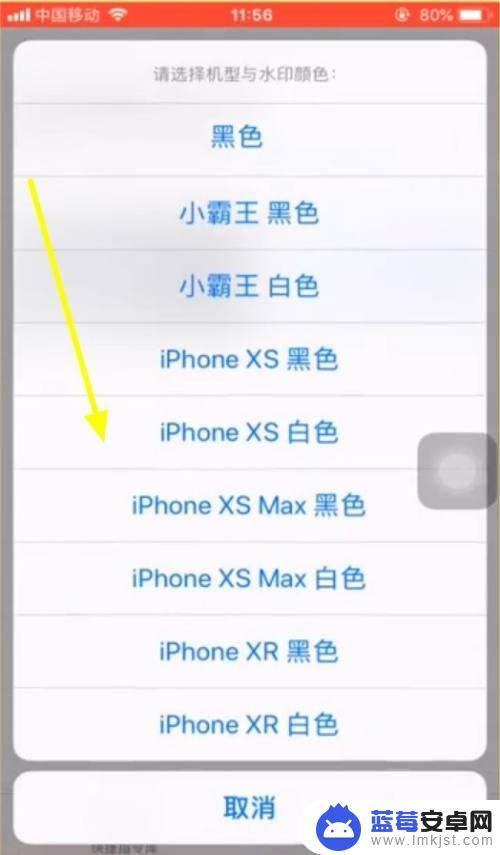
7.根据自己的手机情况,选择手机的型号与水印的颜色。
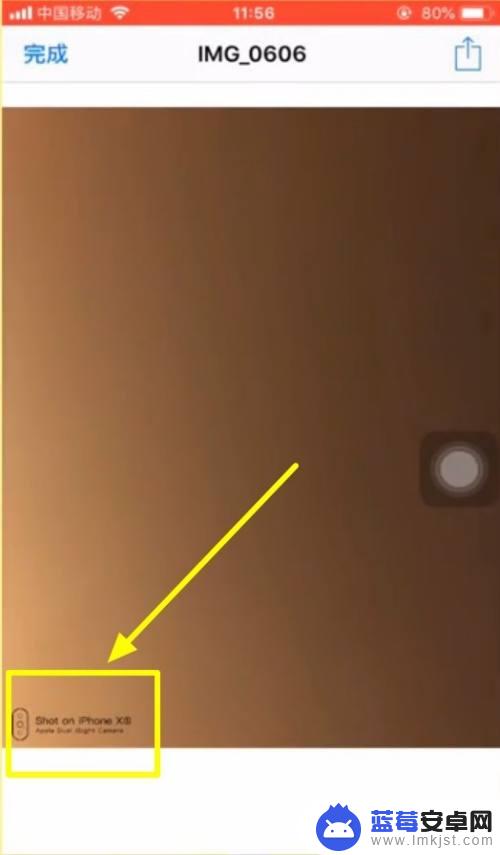
8.这时候就能看到照片上出现了水印。
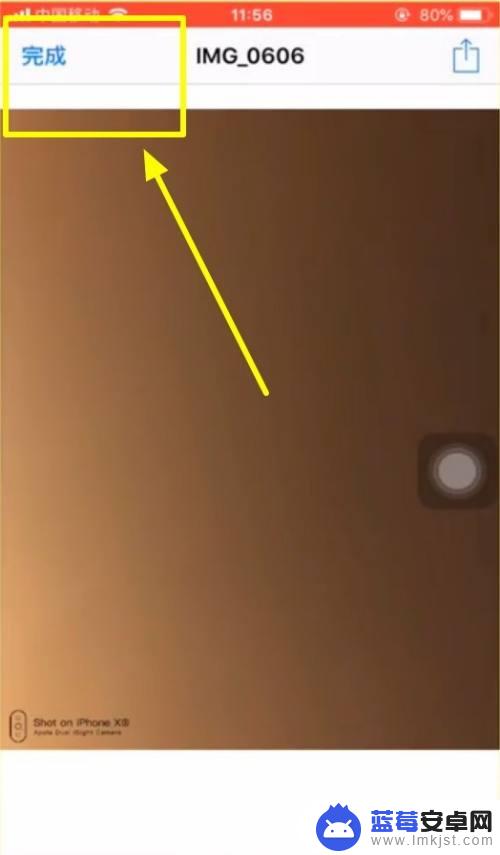
9.点击左上角的完成即可。
以上就是iPhone手机拍照如何添加水印的全部内容,如果还有不清楚的用户,可以参考小编的步骤进行操作,希望对大家有所帮助。